Court Documents
Overview:
Court Documents Tab allows a user to create an accusatory instrument that can be submitted to court. Documentation will illustrate how a Court Document is created on RMS 3.
Court UI:

- Court Tab allows users to access the Court User Interface.
Offenses:

- Court UI has three Tabs - Offense, Defendants and Court Document Details.
- The first tab is Offense which will automatically bring in an offense if only one is listed in the module offense tab. If more than one offense is in the module offense tab, the user will have to drag and drop the offense they want into the current court document.
Drag and Drop Offenses:
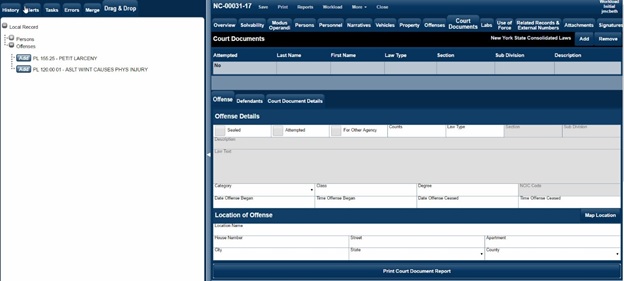
2. Click on the Drag and Drop tab
3. Expand Local Record
4. Expand Offense
5. Click Add on the correct offense or left click and drag offense into Court Document.
Repeat steps 1 – 5 for additional offenses.
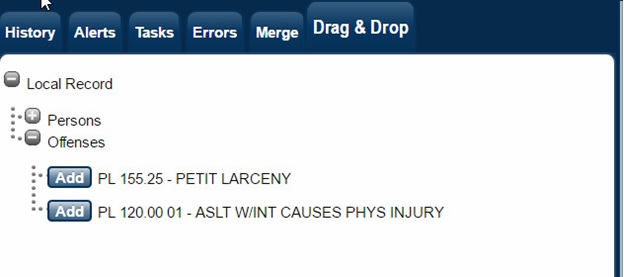
Screen capture illustrates the left side bar open and the Drag & Drop tab selected, showing local record offenses.
Defendants:

- Select the Defendants tab from within court document and click Add.
- From the defendants drop down, select the subject you are creating the court document against. In this example, it is the person Jane Doe listed as the arrested subject.
Court Document Details:
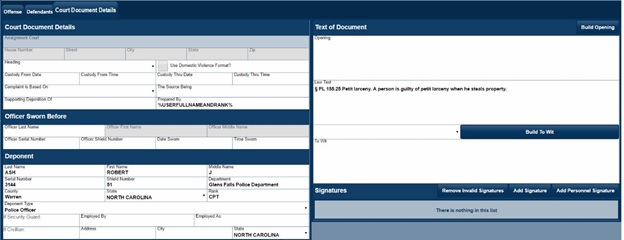
Right Side of Court Document Details:
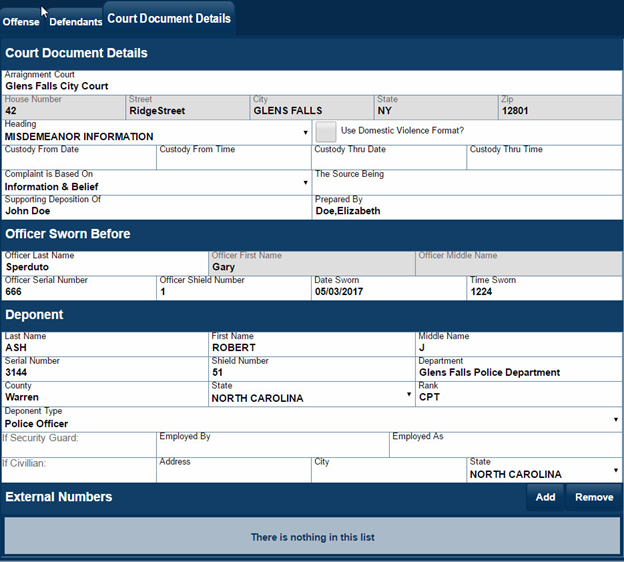
- Screen capture illustrates the left side of the court document Details. Most items are self-explanatory and we will discuss some of the key options.
- Arraignment Court information is configured in Master Organizations.
- Use Domestic Violence Format will add Domestic Violence to the court document header.
- Prepared By – Who prepared the Court Document.
- Deponent Type – Police Officer, Civilian or Security Guard. Depending on which option you select, will format the build opening.
Left Side of Court Document Details:
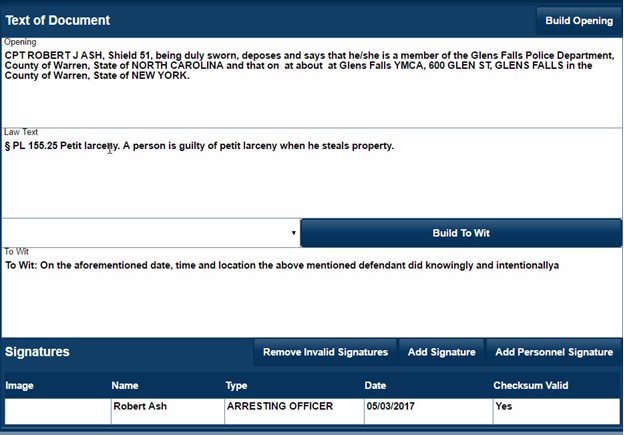
- Screen capture illustrates the left side of the Court Document Details.
- Opening is based on the deponent type of officer, Civilian or Security Guard. When you click Building Opening, that will build the opening text based upon the data entered in the Deponent section of the UI.
- Law Text – Text carries over from the offense Tab of Court Documents and can be edited if needed.
- To Wit – This is the accusatory text and can be preformatted with custom To Wits. Custom To Wits are stored in Setup/Dictionaries/To Wit.
- Signatures – Signatures provide two functions. Places the name of the person who is going to sign the court document on the report. It will also add a digital signature if one is on file for the officer or manually captured for a civilian.
-
@alert:AA signature entry MUST be added to the report regardless if you do not use digital signatures.
Otherwise the printed name of the signing person will not appear on thedocument.@@document.
Finished Court Document:
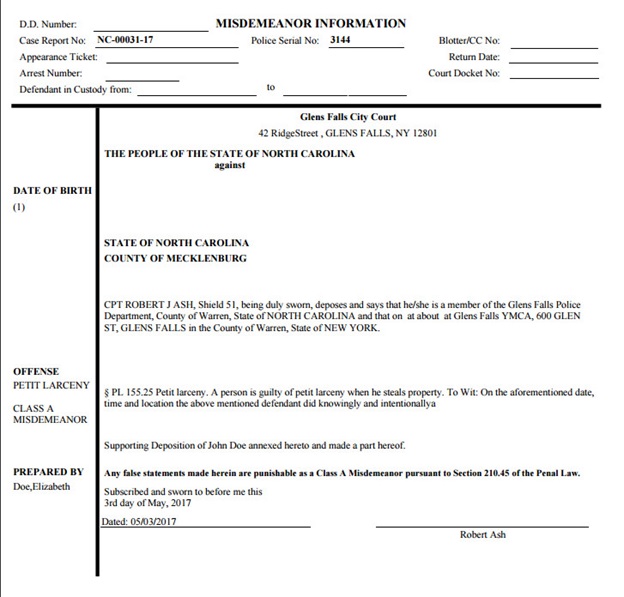
- Screen capture shows a sample completed Court Information.
- Court Document can be print out from Module Report’s or from Court Document Tab.