Equipment
Overview:
Equipment module enables a department to log equipment that gets issued to their members on a regular or semi-regular basis.
Examples are Tasers, Assault Rifles etc. The module will track when the item was issued, returned and by whom.

Equipment Entry:
- Equipment module is where you will enter your department equipment, that will be tracked as it gets checked out/in.
- To add new equipment user will select Create New Equipment.
- To edit/view an equipment item select view next to the equipment item you wish to access.

- Above illustrates a blank the equipment UI, users will need to add information to Description, Serial Number, and Type.
- Type is a dictionary that can be configured as needed by the police agency.
Equipment Status:

- Screen capture illustrates an equipment item and its status.
Equipment Check Out:
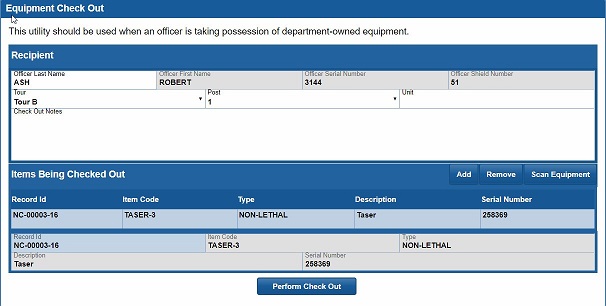
- Equipment Check Out tracks which officer is taking out equipment and when.
- Items being taken out is the equipment items the officer is receiving and more than one equipment item can be selected for a transaction.
- Once all items are selected, the user will then select Perform Check Out.

- Last step is to confirm the user received the equipment, by entering the password for the user receiving the property confirmation.
Note: The logged in person can Check Out property for another user if they know that user's password or the person receiving the equipment can enter it in themselves.
Equipment Check-In:
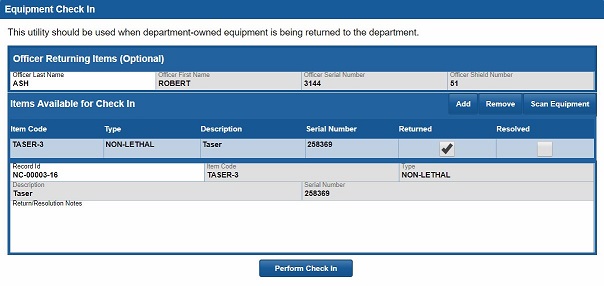
- Equipment Check-In will show all equipment currently check out when the officers entered their name.
- Officer will select the checkbox under returned for each item checked in.
- Items lost or misplaced will not get checked as returned.
- Once a lost/misplaced item of equipment is located, the officer will select the Resolved checkbox and has the option to add a note at the bottom of the UI.

* Final step in the Check-In process is to confirm the items being checked in by re-entering the logged in users password.
Disable Password verification for Equipment Transaction Check In/Out.
- The need for a password verification for Check In/Out can be disabled in Permission Setup.
- If Bypass permission is Unchecked for Equipment Transaction, password verification is enabled.
- If Bypass permission is checked for Equipment Transaction, password verification is disabled.