Scheduled Jobs
Overview:
Allows users to configure reports to run at a specific date and time and send those reports by internal RMS e-mail or Internet/Intranet e-mail. Scheduled Jobs Info:
Scheduled Jobs Info:
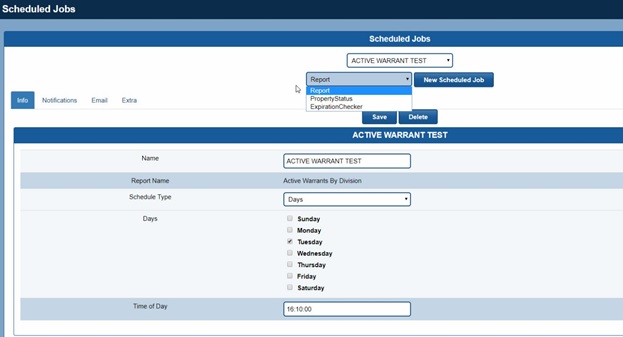
- Select which schedule job type you want to create and select New Schedule Job and follow options.
- Select either Report/Property Status/Expiration Checker – Report is most common to setup.
- Give users the ability to custom name their report.
- Name of actual report selected.
- Selected your schedule type.
- Interval – Hours.
- Days – Days of the week to run schedule.
- Which date of the month to run the report.
- What time of day to run this scheduled job.
Note - Parameter options are different for Interval, Monthly and Days.
Notifications:

- Users not assigned to receive scheduled jobs.
- Users assigned to received schedule jobs.
- Groups not assigned to receive scheduled jobs.
- Groups assigned to receive scheduled jobs.
Email:
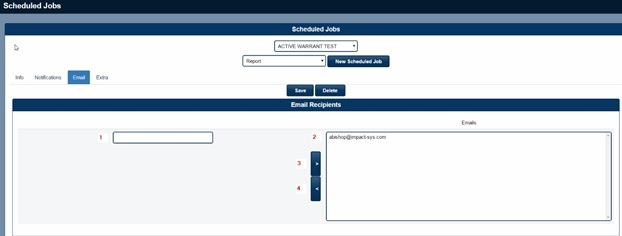
- Add internet or Intranet email address.
- Display area for emails added.
- Add new email from item 1.
- Remove email from item 2
Extra:
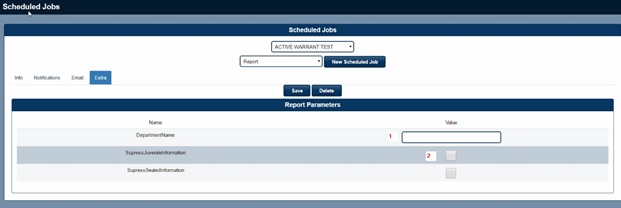
- Department Name.
- Options for additional parameters if present.
Expiration Checker:
- Record Type - Which Module you want to create an expiration check in.
- Date Comparison Field - Which Date field is going to be used for the date comparison in the module.
- Change Field - Which field is going to be changed after the date comparison is matched.
- Change Value - What will be the new value in the field after the date comparison is matched.
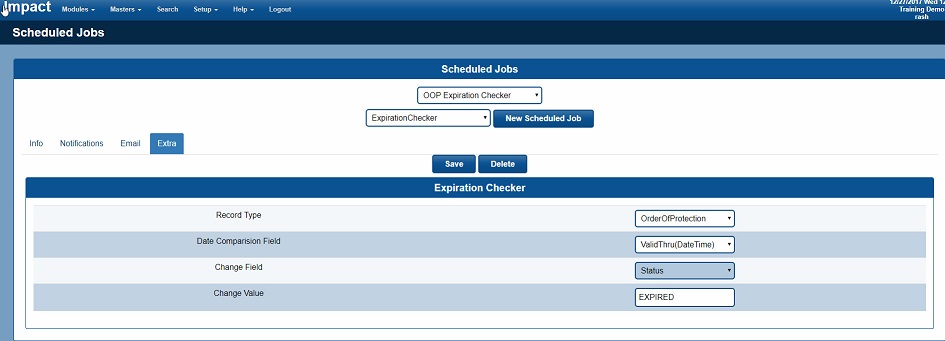
Screen capture illustrates an example of an Order of Protection Expiration Checker
- Record Type - Is the Order of Protection Module.
- Date Comparison Field - Is valid to date for the OOP.
- Change Field - The OOP Status Field in the OOP module.
- Change Value -The value that will be placed in the Status Field when the OOP expires.